Automatically installing Shiny and RStudio server on Amazon Web Services with Ansible

After writing a very similar post about installing Shiny and RStudio server on a Raspberry Pi using automation with Ansible, I realized that the same approach can be easily ported to work with cloud computing services as well, so, basically, this is going to be the Amazon Web Services (AWS from now on) version of that post.
✏️ Have in mind that this is a beginner-oriented project, it is not meant as a production tool, so if you are already familiar with Ansible you might want to simply download some roles from Ansible Galaxy and integrate them into your workflow instead of following this article.
In case you haven’t read the aforementioned post, I’m going to tell you what this is about. The installation and configuration process of an R-based data science server on AWS can be automated using a tool called Ansible, those in DevOps must be familiar with the power of Ansible but even if you’ve never heard of it, don’t worry, you don’t need to know Ansible in order to take advantage of its automation capabilities, I’m not an Ansible expert myself and I’ve been capable of accomplishing this project with just basic knowledge of the tool, so if I can do it, so can you. I’m going to guide you through the process assuming you have no prior experience with this tool and just some basic Linux terminal skills.
Ansible is an open-source software provisioning, configuration management, and application-deployment tool enabling infrastructure as code. It runs on many Unix-like systems, and can configure both Unix-like systems as well as Microsoft Windows. In layman’s terms, it lets you automate tasks in your infrastructure (One, or many EC2 instances at once, in our case) by defining a set of steps to execute, in YAML files called “playbooks”.
I have wrote some Ansible playbooks to automate most of the installation process but leaving some room for you to configure the installation to your liking without having to modify the playbooks (which will require you to know how to edit them) via a config file. Although, if you want to have a basic understanding of how this tool works, there is a nice Ansible 101 series on Jeff Geerling’s YouTube channel.
In case you are not familiar with AWS, it is a cloud services provider that among many other things, it provides access to virtual servers hosted on the cloud, so you don’t have to take care of a physical infrastructure yourself, also, to follow along with this article, there are some AWS specific terms that we need to define in simple terms:
- EC2 Instance: It refers to an individual instance of a virtual server.
- Amazon Machine Images (AMI): It provides the information required to launch an instance, like the Operating System, pre-installed libraries and configurations required for a server to work. Note that you can make your own AMIs.
- Regions: Amazon EC2 is hosted in multiple locations world-wide. These locations are composed of Regions, and each Region is a separate geographic area.
- Security Group: A security group acts as a virtual firewall for your instance to control inbound and outbound traffic.
Create an AWS Account and Security Credentials
In order to use AWS services you need to have an account, if you already have one, you can skip this part, if not, to create one go to https://aws.amazon.com/ and click on “Create an AWS Account”, fill in the required information and keep pressing “Continue”, you are going to be asked to provide your credit card information, but you are not going to be charged for using the products comprised on the “Free Tier” at least for a year.
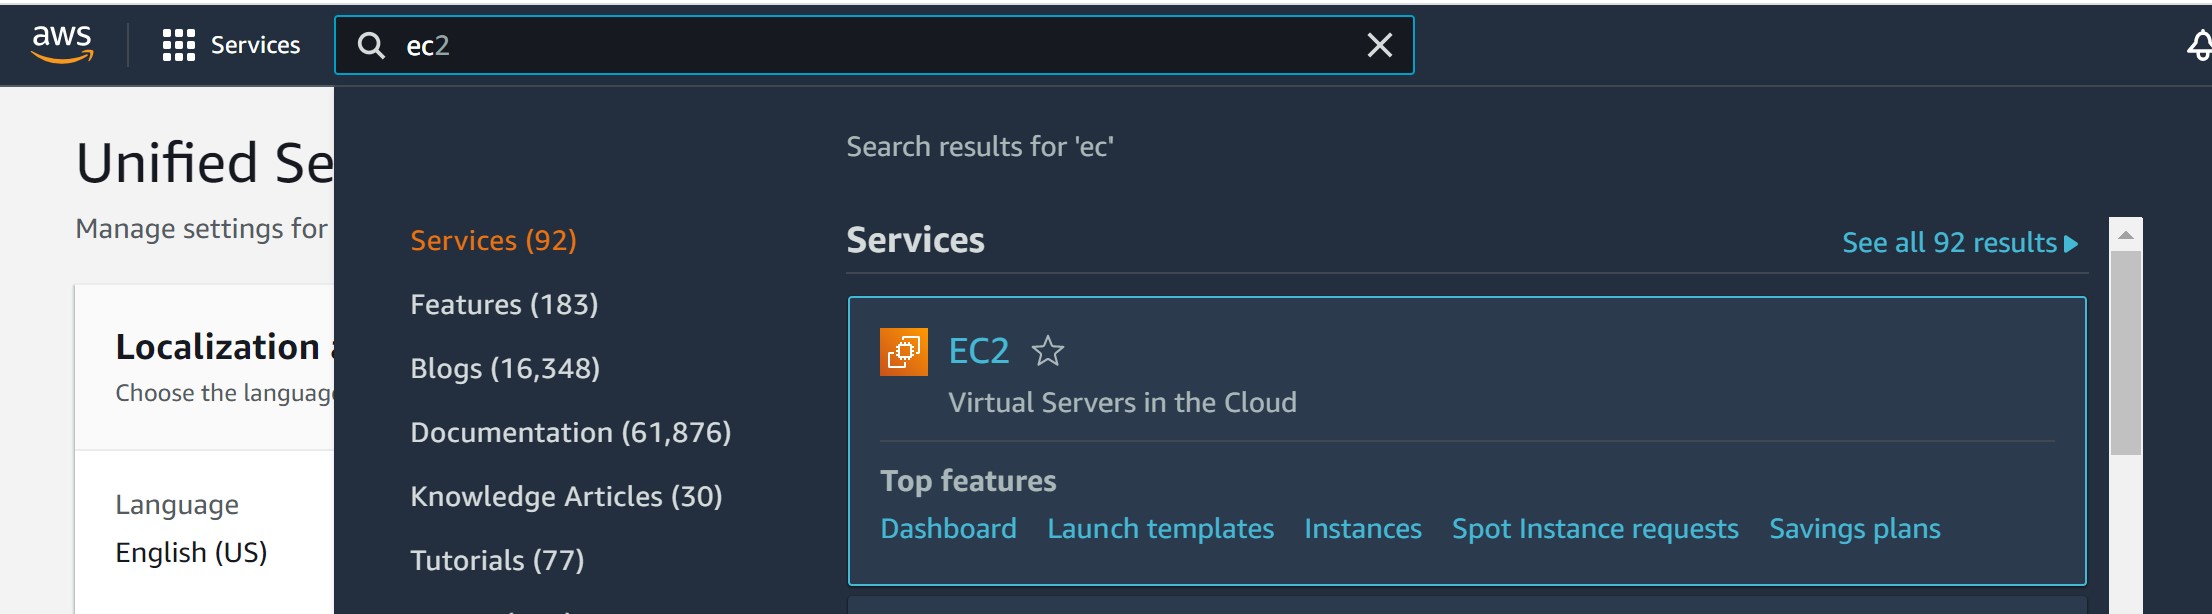
Once your account has been created, go to the “AWS Management Console” and log in, once there, click on the search button, type “EC2” and select “EC2 Virtual Servers in the Cloud”.
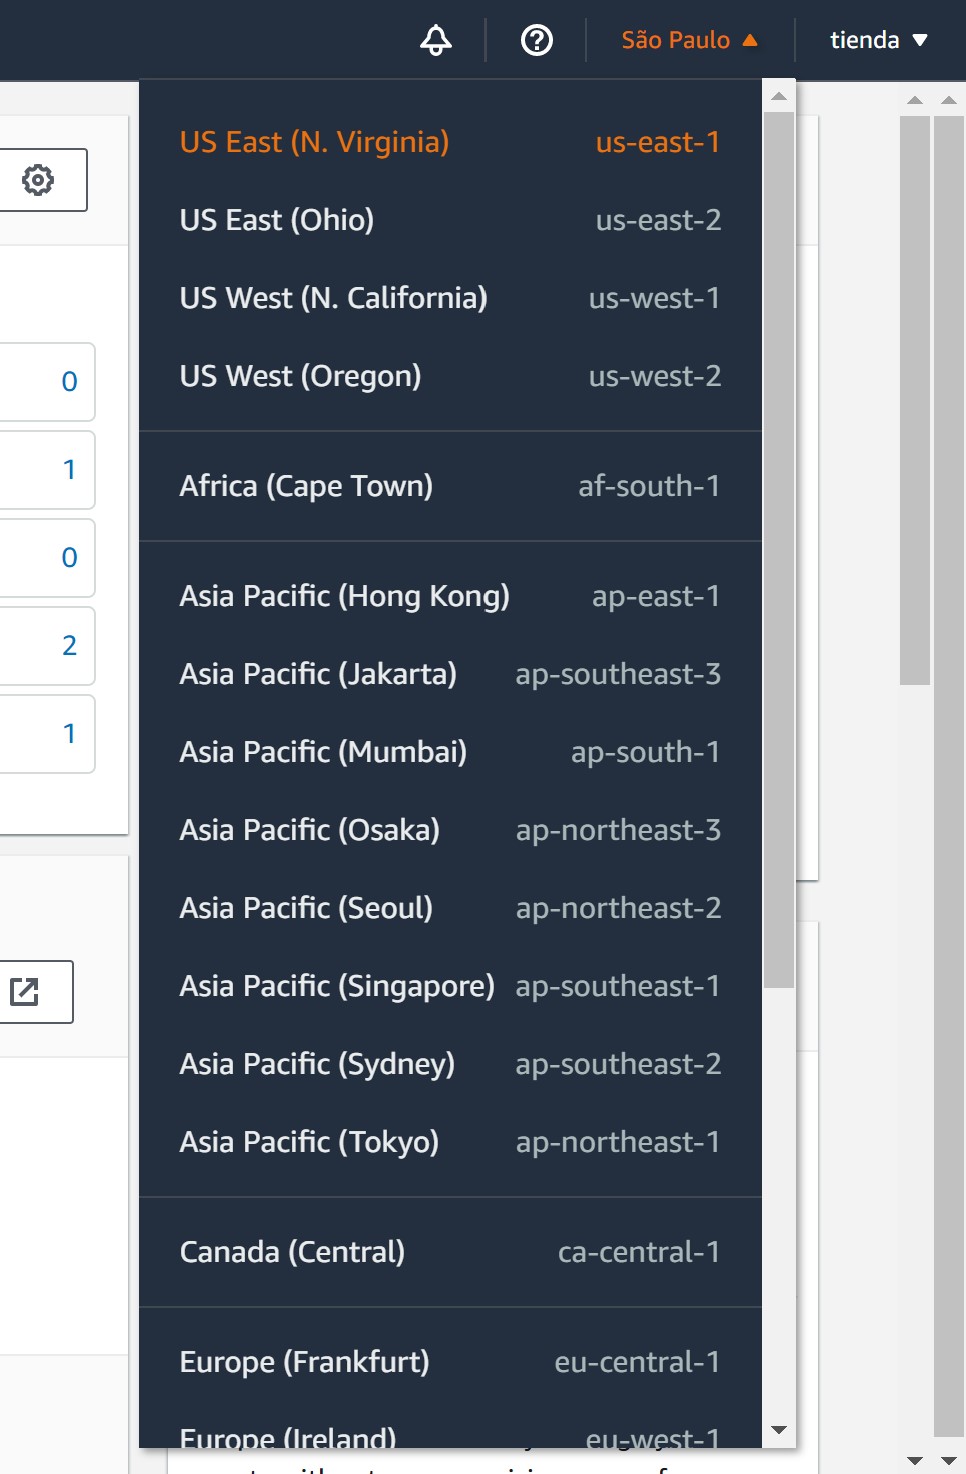
On the upper right corner choose a suitable region, the geographically closer to you the better. Remember your choice since you have to set this exact same location in the playbooks later.
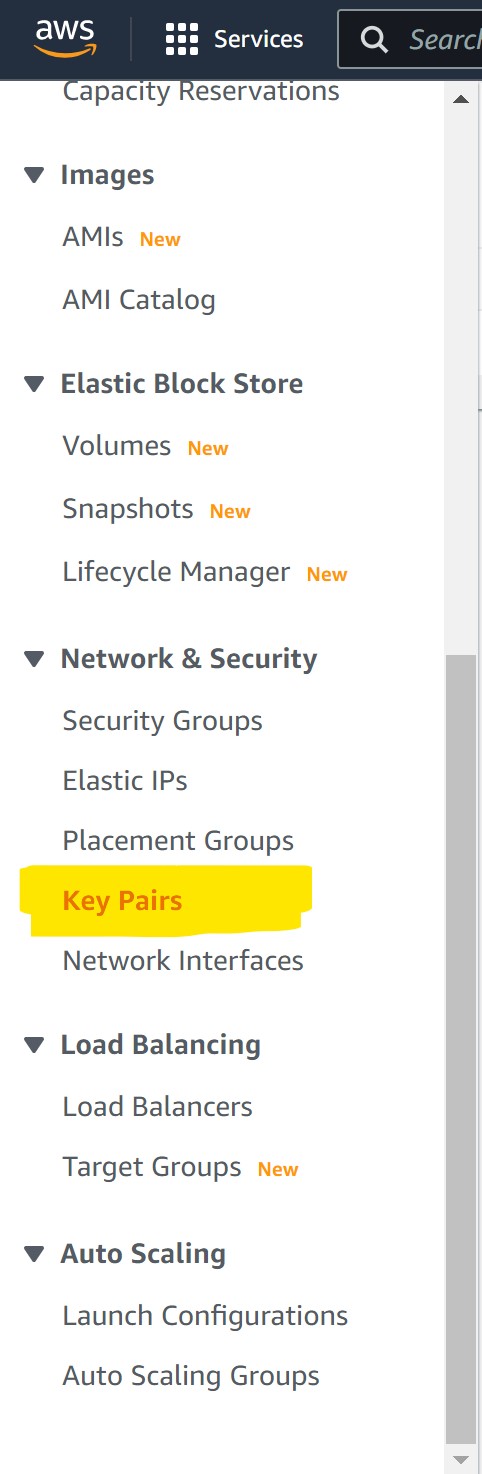
Then in the left menu, look for “Network & Security -> Key Pairs” and click on it.
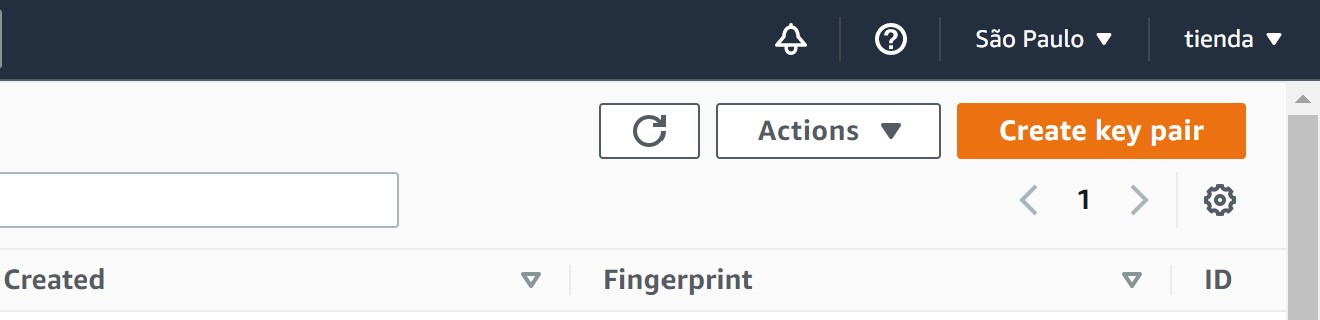
On the right upper corner look for “Create Key Pair” and click on it.
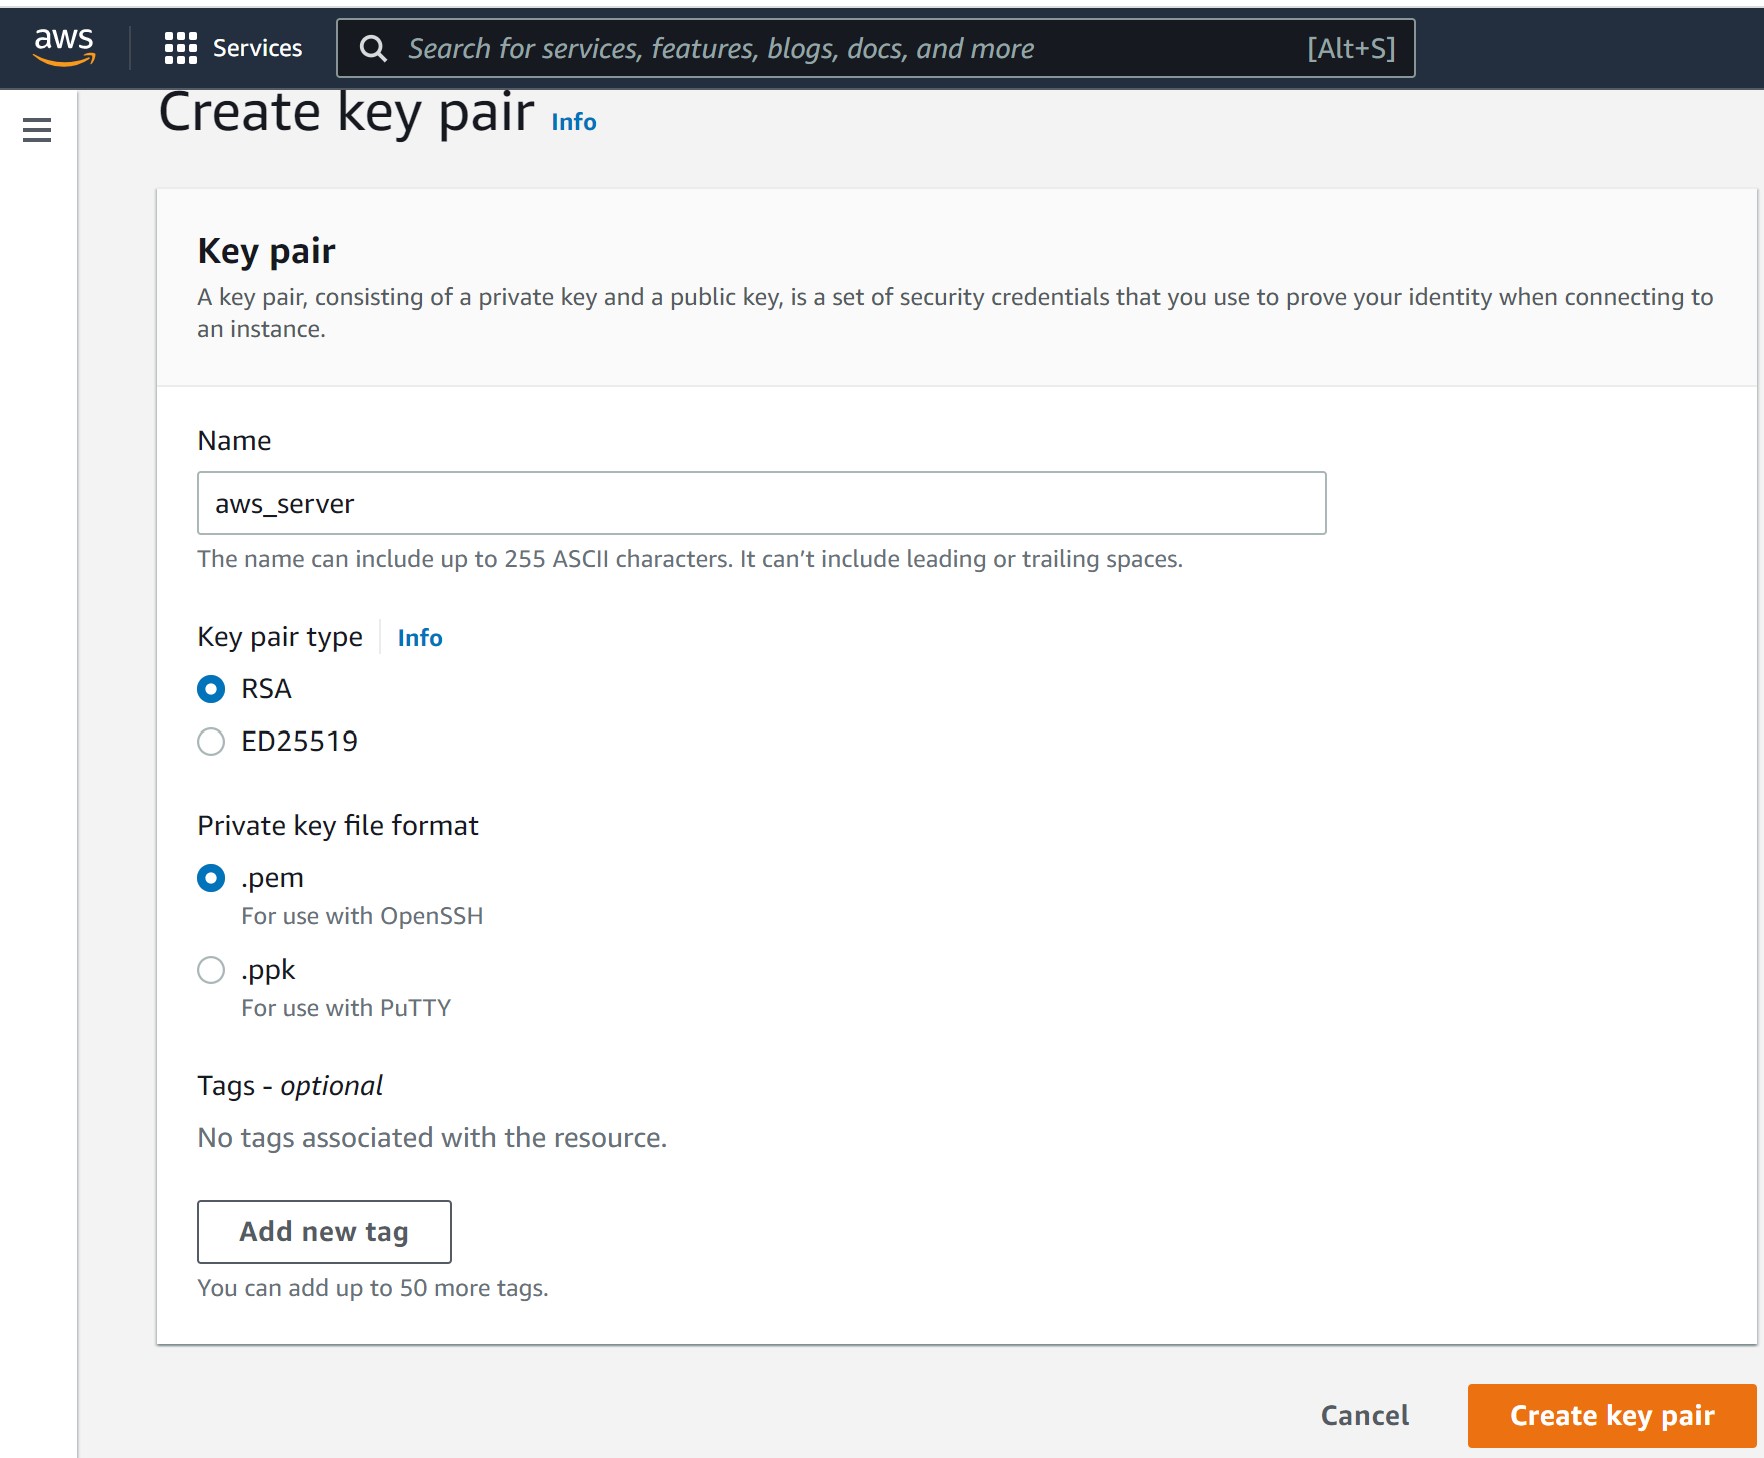
You are going to see this dialog box, fill it this way, click on “Create Key Pair” and save the resulting file on this path, ~/.ssh/aws_server.pem, in your machine.
Set propper permissions for your key file, the .ssh directory permissions should be 700 (rwx______) and the private key (aws_server.pem) should be 600 (rw_______).
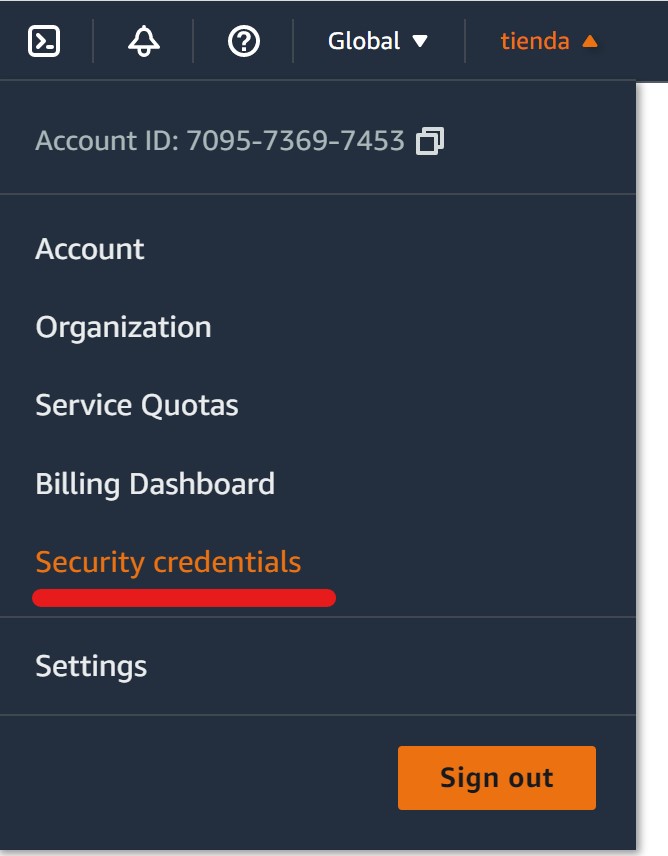
Next, you need to create an access key, so you can have access to your account programmatically, go to your account menu and select “My Security Credentials”.
Then select “Create New Access Key” and save the file with your credentials
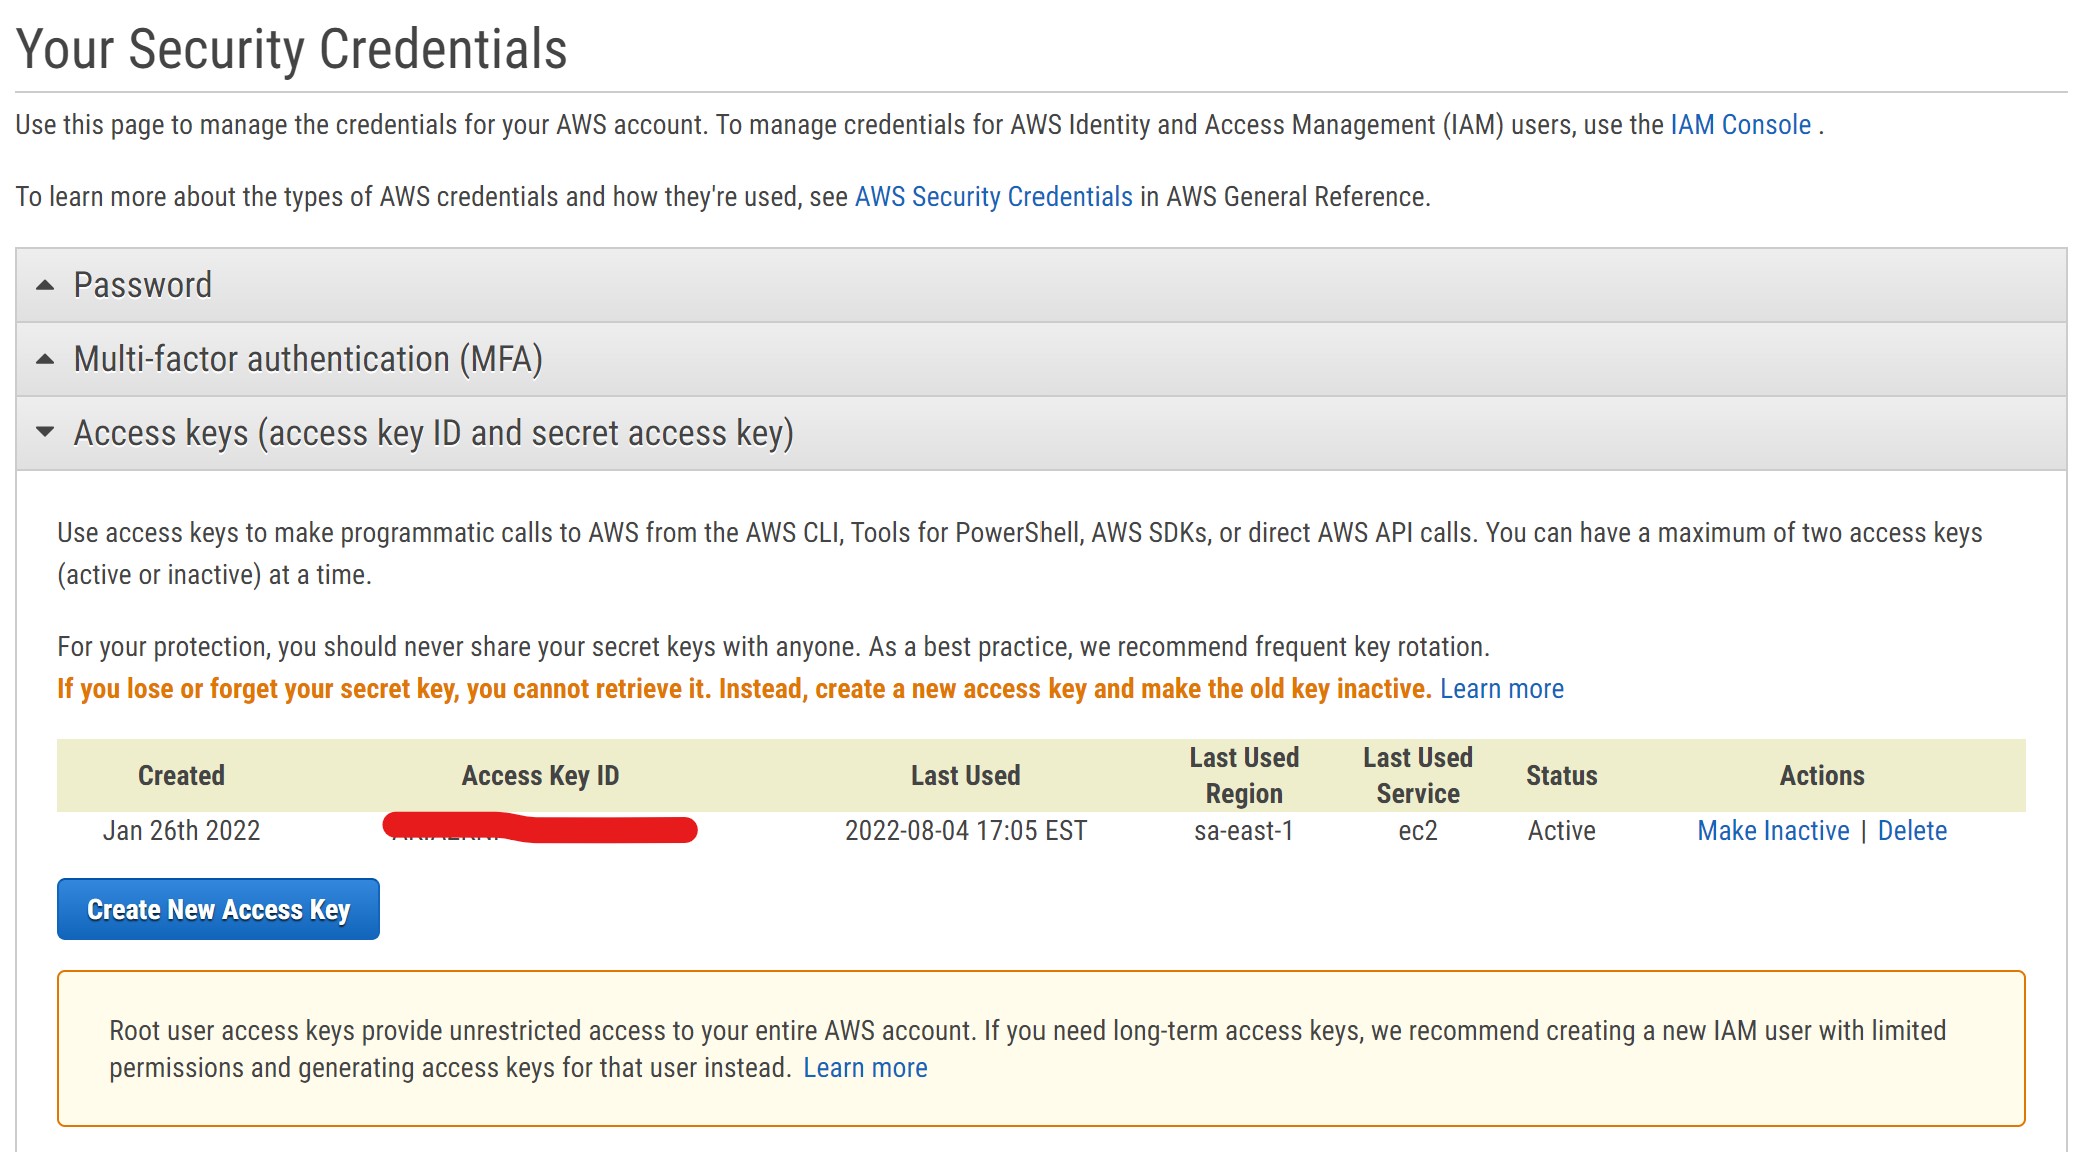
⚠️ Keep the downloaded file safe and at hand, you are going to need it later. Be careful not to share this file since it could enable other people to generate charges to your credit card.
Install Ansible
It is possible to install Ansible locally on the EC2 instance itself and run playbooks directly on it with connection: local but it wouldn’t be practical, because among other things it would require us to manually launch the EC2 instance, it is better to run the playbooks from a system other than your EC2 instance.
For installing Ansible, if you have a Unix based system (i.e. Linux, macOS) at your disposal, you are golden, installing Ansible is very simple.
# Install python3
sudo apt install python3 # On macOS use `brew install python3`
# Install pip3
sudo apt install python3-pip
# Install Ansible version 9.5.1 (for reproducibility) with pip3
sudo pip3 install ansible==9.5.1 --break-system-packages
If you are on Windows, sadly, there is no way to run Ansible natively, your best bet is to enable WSL (Windows Subsystem for Linux), install a Linux distribution from the Microsoft Store (I recommend Ubuntu), and execute the previous steps in your Linux VM.
A detailed guide for installing WSL can be found here and more information about installing Ansible can be found on the official documentation site.
Also, since we are going to be testing this with a low power EC2 instance (i.e. T2.Micro), some of these tasks are going to take a while and the SSH connection might get automatically closed due to inactivity, to prevent this situation, activate the sending of “keep-alive” packets to the server by editing the ssh_config file with sudo nano /etc/ssh/ssh_config and adding this two lines under Host *:
⚠️ Is very important not to skip the previous step, otherwise, the ssh connection is going to silently fail while running long tasks in Ansible and you are going to be waiting pointlessly with your EC2 instance doing nothing in reality.
Download and Configure the Playbooks
The playbooks are on a public repository on GitHub, you can clone the repository with these commands:
# Install git if you don't have it already
sudo apt install git # On macOS use `brew install git`
# Clone the latest commit from the repository
git clone https://github.com/andresrcs/aws_r_server.git --depth 1
To start configuring the playbooks, you usually first need to define an “inventory” (a list of servers to connect to), but in this case, the provision_ec2_instance.yml playbook is going to create one automatically for you when you run it and the other playbooks are going to get an updated inventory from AWS automatically using the aws_ec2 plugging when needed, this is one of the advantages of working with well supported cloud computing services like AWS, but in order for the aws_ec2 plugging to do its magic, you need to provide it with your AWS credentials and define your AWS EC2 region, so edit the aws_r_server/inventories/aws_ec2.yml file, and fill your credentials and region on the respective variables. Remember that you already created these credentials on a previous step and you saved a .csv file containing them, also the AWS Region you set here has to be the same one you selected when you started creating your credentials.
---
plugin: aws_ec2

aws_access_key: 'your_key_goes_here'
aws_secret_key: 'your_secret_goes_here'

regions:
  - 'closest_aws_region' #  e.g. sa-east-1

hostnames:
  - 'ip-address' # Do not change this

keyed_groups:
  - key: tags.inventory_group
Now, if you want to change the default installation settings, you can do it by editing the variables on the aws_r_server/vars/config_vars.yml file, although, the default options are fine for most use case scenarios, including reasonable security settings to use on real-world applications. The only things you certainly need to change here are the AWS credentials, AWS region, AWS AMI (it changes constantly even for the same OS version) the personal user and password, and the password for the PostgreSQL main user.
✏️ This post has been written as an example of applying this approach with cloud computing services so for simplicity’s sake, I have made it work only with the Ubuntu Server 22.04 LTS AMI, so to be clear, it is not OS-agnostic. If you want to use it with an RHEL based AMI you would need to modify the playbooks considerably.
---
# AWS Config Vars ##############################################################

# AWS credentials
aws_access_key: 'your_key_goes_here'
aws_secret_key: 'your_secret_goes_here'

# General AWS configurations
aws_region: 'closest_aws_region' #  e.g. sa-east-1
aws_ec2_ami: 'ami-08ae71fd7f1449df1' # Ubuntu 22.04 LTS

# List of instances
instances:
  - name: rstudio
    group: aws
    security_group: ["default", "public_server"]
    ssh_key: aws_server
    type: 't2.micro'

# AWS firewall settings
security_groups:
  - name: public_server
    rules:
      - proto: tcp # http
        from_port: 80
        to_port: 80
        cidr_ip: 0.0.0.0/0
      - proto: tcp  # https
        from_port: 443
        to_port: 443
        cidr_ip: 0.0.0.0/0
      - proto: tcp  # SSH TCP
        from_port: 22
        to_port: 22
        cidr_ip: 0.0.0.0/0
      - proto: udp  # SSH UDP
        from_port: 22
        to_port: 22
        cidr_ip: 0.0.0.0/0
      - proto: tcp  # PostgreSQL
        from_port: 5432
        to_port: 5432
        cidr_ip: 0.0.0.0/0
    rules_egress: []

# System Configurations ########################################################

# Personal user
personal_user: 'your_linux_user'
personal_user_password: 'very_secure_password'

# Swap parameters
swap_file_path: /var/swap
# Use any of the following suffixes
# c=1
# w=2
# b=512
# kB=1000
# K=1024
# MB=1000*1000
# M=1024*1024
# xM=M
# GB=1000*1000*1000
# G=1024*1024*1024
swap_file_size: 3GB
swappiness: '10'

# Language and locale
language_pack: []                 #  e.g. language-pack-es-base
default_locale: 'en_US.UTF-8'     #  e.g. es_PE.UTF-8

# Security Configurations ######################################################

# Postgresql Password
postgres_password: 'very_secure_password'

# Access rules for Postgresql
postgresql_rules:
  - { contype: local, users: all, address: samehost, method: trust }
  - { contype: local, users: postgres, address: samehost, method: trust }
  - { contype: host, users: all, address: 0.0.0.0/0, method: password }
  - { contype: host, users: all, address: 127.0.0.1/32, method: md5 }
  - { contype: host, users: all, address: '::1/128', method: trust }

# Main Software Versions #######################################################

# Shiny-server version to install
shiny_server_version: '1.5.19.995'

# RStudio version to install
rstudio_version: '2022.07.1+554'
preview_version: false
Run the Playbooks
You could simply access the aws_r_server folder and run the main.yml playbook to install everything at once like this:
But to make the installation process more flexible, I have divided the process into four individual playbooks:
ansible-playbook provision_ec2_instance.yml
ansible-playbook install_basic_services.yml
ansible-playbook install_shiny_server.yml
ansible-playbook install_rstudio_server.yml
⚠️ When provisioning the ec2 instance the AWS API sometimes fails to return the instance IP causing the playbook to fail. This is a random error not caused by the playbook, you can safely ignore it if you are running individual playbooks and the instance has already been provisioned.
If you decide that you only need Shiny server or RStudio server but not the other, or you already have installed the support services you are going to use, then you can run only the playbooks you actually need.
If you want to update something in the future, like RStudio, or Shiny server (I can’t guaranty this is always going to work out of the box), you can simply change the version in the config file and run the specific part of the playbook by taking advantage of the defined “tags”.
For example, this will only install the RStudio version defined in the config file and nothing more:
The available tags are:
- install_basic_services.yml
secure: Set security settings on the serverswap: Add swap memory to the servernginx: Install and configure Nginx + PHPpostgresql: Install and configure PostgreSQLr: Install R from the CRAN repository
- install_shiny_server.yml
shiny-server: Install shiny-serverconfigure_shiny: Configure shiny-server
- install_rstudio_server.yml
rstudio: Install RStudio serverconfigure_rstudio: Configure RStudio server
You can also go the other way and skip specific parts of the playbooks by using the --skip-tags option, for example, if you don’t need PostgreSQL, you can avoid installing it by running the playbook this way:
After successfully running all the playbooks, you will have a fully functional installation ready to be used, so you could simply open an RStudio session at http://your_server_ip/rstudio/ and/or publish your Shiny apps in the /srv/shiny-server folder and access them at http://your_server_ip/shiny/your_app_name.
Final Notes
To finish I just want to make you aware that there are other options for getting RStudio and Shiny server on AWS that you might consider to be simpler, like using a premade AMI or containers, but they are not as flexible and customizable as defining your own infrastructure in code with Ansible. Obviously, the example in this article is my conception of a basic installation for an R-based data science server but you can use it as a starting point to custom tailor your own infrastructure and make your workflow more efficient as you become more proficient with Ansible.